June 10, 2026
How Best To Photograph the Northern Lights in Iceland
Many dream of experiencing the Northern Lights and to be blown away by this incredible light show in the sky, also known as the Aurora Borealis. Iceland has been a big Northern Lights destination for a number of years - and it’s no wonder! Iceland's favorable conditions maximize the chances of viewing and photographing the incredible Northern Lights, which often tops the bucket list of visitors to Iceland. For most people, taking pictures of your vacation is a must - especially when you’re seeing something as spectacular as the Aurora Borealis. So, can you just point your camera/phone to the sky and shoot away? Well, you could, but chances are you will be disappointed. To help you achieve the results you want of the Aurora Borealis, we’ve compiled a short list of things to remember while trying to capture the perfect Northern Lights photo.
Where to shoot the Northern Lights
One of the reasons why Iceland is perfect for photographing the Northern Lights is the small amount of light pollution. While it is possible to catch a glimpse of the lights from Reykjavík, it’s best to head somewhere more remote. One only needs to drive a short distance to a nearby town or village in your rental car to reduce the negative effects of light pollution. Wherever you are driving on the roads in Iceland, you only need to drive a few miles to avoid light pollution. If you are in Reykjavík, we recommend you take Route 1 towards Selfoss, and as soon as you have left Reykjavík, take any side road (make sure the road has been cleared so you don’t have to drive in thick snow) and park when you find a suitable place. If you are lucky, there will be Northern Lights dancing above your head.
When to shoot the aurora borealis in Iceland
The phenomenon that creates the Northern Lights occurs all year round, but the lights are only clearly visible when the sky is dark and cloudless. These conditions will therefore be required if you’re attempting to capture them on camera. Best photographs are possible when nights are getting longer but the weather is not harsh, starting in early September. April is typically when the nights begin to grow shorter and lighter, and chances slowly diminish. It’s also important to check the weather constantly, as weather conditions can be quite temperamental in Iceland. While skies could be clear when you set off, cloud cover can appear in no time at all. Check the official Aurora borealis forecast during your trip to nail down the best days to head out and shoot.
Equipment for shooting Aurora Borealis
According to experts, you will need a DSLR camera and a tripod to get satisfying photographs. A remote for the camera would be brilliant too, but a built-in timer can be just as good. The reason for this is when you hit the capture button, the camera will move slightly and this will ruin the shot with long exposure settings.You need a lens that is wide and bright, like a 20mm lens with an F stop of 2.8 or under. The Northern Lights are much darker than what they appear to be, so you want the camera to gather as much light as possible.
Camera settings for Northern Lights photography
Shooting the Northern lights is a little like shooting a waterfall: The longer the camera is capturing, the blurrier the lights will become. The aurora borealis is not stationary, it moves around, sometimes at great speed, like running water. So when taking shots, have your camera at its lowest F stop and the ISO as high as you can without the pictures becoming grainy (i.e. too much noise). Experiment with an ISO setting between 800 and 1600. This will ensure that the shots are crisp and clear.If possible, take the pictures in RAW instead of JPEG. Not only do you have a bigger range of light to work with when editing afterward, but it also allows you to havemuch better control of the white balance.
Photography Technique
So you are all set up eagerly anticipating shooting the lights, but what should you focus on? Start by setting the lens and the camera on manual focus and just set the focus where you want it, be it the stars, the moon, a skyline, or a tree line. If you don’t have a live view, you might find it hard to use the viewfinder to focus in the dark but that is easily overcome by turning the focus to infinity. Take a few test shots of stars, like a second long or so, and see if you are happy with the results. Also, try to turn the focus just a touch away from the infinity setting and look at the result.
Once you are happy with the focus, you only have to set the time. Start off with 10 seconds and see what happens, then you can try other time settings until you capture the perfect image. A good white balance number to start with is around 4000k. See if you are happy with the results and adjust to your liking.
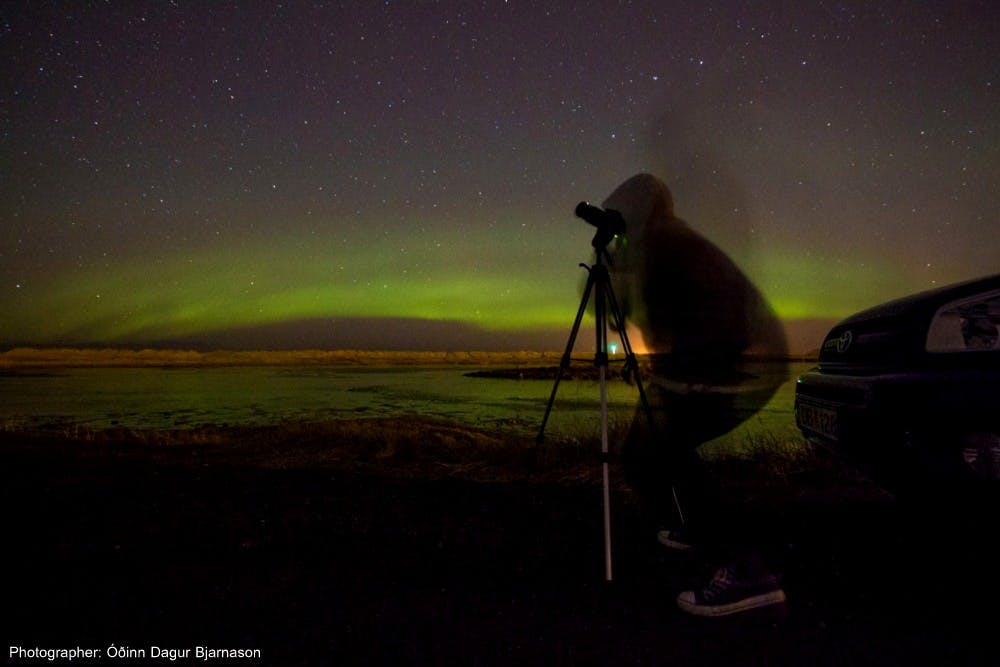
Photographing the Northern Lights in Iceland will require a few additional considerations. It’s usually very cold, and might even be very windy. This is why a rental car is the best way to go, as it provides shelter and a means of transporting your gear. You can also use your vehicle to shield and stabilize your tripod from the possible winds. One thing to bear in mind is not to take the camera in and out of the rental car in cold weather, as you will create condensation on your lens. When you have taken it outside, keep it outside until you are done with your photo session.
Additional equipment
Aside from cameras, you’ll need proper thermal underwear and to dress in layers. Get yourself a pair of Icelandic woolen socks and something warm on your head too. If it’s possible, bring something warm to drink and something to eat, as you’ll burn a lot of calories being out in the cold. Traveling with lots of photography gear and need to rent a vehicle? Opt for a van like the VW Caravelle, a comfy, capable choice when you need extra space.
Please note that the appearance of Northern Lights is never a guarantee and you might have to repeat this trip a few times for the perfect picture! You can also keep an eye on the Aurora forecast supplied by the Icelandic Met Office to improve your chances.